| Old Command | New Command | Purpose |
| sfdx | To check whether the CLI is installed in our system. | |
| sfdx plugins –core | To check installed version of Salesforce CLI | |
| sfdx plugins:install salesforcedx@latest | If there is a pre-release version of CLI in our system, and we want to update it. | |
| sfdx -v | To check the version of installed CLI | |
| sfdx org login web -d -a DevHub | Create an alias DevHub by using -a and make this the default org using -d | |
| sf org create scratch -d -f config/project-scratch-def.json -a ScratchOrgName-org | Create a Scratch Org. First connect to DevHub from VS Code and then run this command. | |
| sf org open | Open scratch org | |
| sfdx force:source:retrieve -m CustomObject | sf project retrieve start -m CustomObject | Retrieve all Custom objects |
| sfdx force:source:retrieve -m CustomObject:Activity | sf project retrieve start -m CustomObject:Activity | Retrieve a Standard Object (i.e Activity) |
| sfdx force:source:retrieve -m ApexClass | sf project retrieve start -m ApexClass | Retrieve all Apex classes |
| sfdx force:source:retrieve -m ApexPage | sf project retrieve start -m ApexPage | Retrieve all Visualforce Pages |
| sfdx force:source:retrieve -m ApexTrigger | sf project retrieve start -m ApexTrigger | Retrieve all Apex Triggers |
| sfdx force:source:retrieve -m LightningComponentBundle | sf project retrieve start -m LightningComponentBundle | Retrieve all LWC |
| sfdx force:source:retrieve -m AuraDefinitionBundle | sf project retrieve start -m AuraDefinitionBundle | Retrieve all Lightning Aura Components |
| sfdx force:source:retrieve -m PermissionSet | sf project retrieve start -m PermissionSet | Retrieve all Permission Sets |
| sfdx force:source:retrieve -m CustomMetadata | sf project retrieve start -m CustomMetadata | Retrieve all Custom Metadata |
| sfdx force:source:retrieve -m QuickAction | sf project retrieve start -m QuickAction | Retrieve all QuickAction |
| sfdx force:source:retrieve -m FlexiPage | sf project retrieve start -m FlexiPage | Retrieve all Flexi Pages |
| sfdx force:source:retrieve -x manifest/package.xml | sf project retrieve start -x manifest/package.xml | Retrieve all metadata using package.xml |
| sfdx force:source:retrieve -m CustomLabel | sf project retrieve start -m CustomLabel | Retrieve Custom Label |
| sfdx force:source:retrieve -m EmailTemplate:FolderName\EmailTemplateName | sf project retrieve start -m EmailTemplate:FolderName\EmailTemplateName | Retrieve Email Template |
Unable to create a Sales Email Prompt Template?
When creating a new Prompt Template, three types of templates are visible by default:
- Field Generation
- Flex
- Record Summary
However, to create a Sales Email Prompt Template, follow these steps:
- Go to “Einstein for Sales”
- Check the toggle, “Turn on Sales Email”
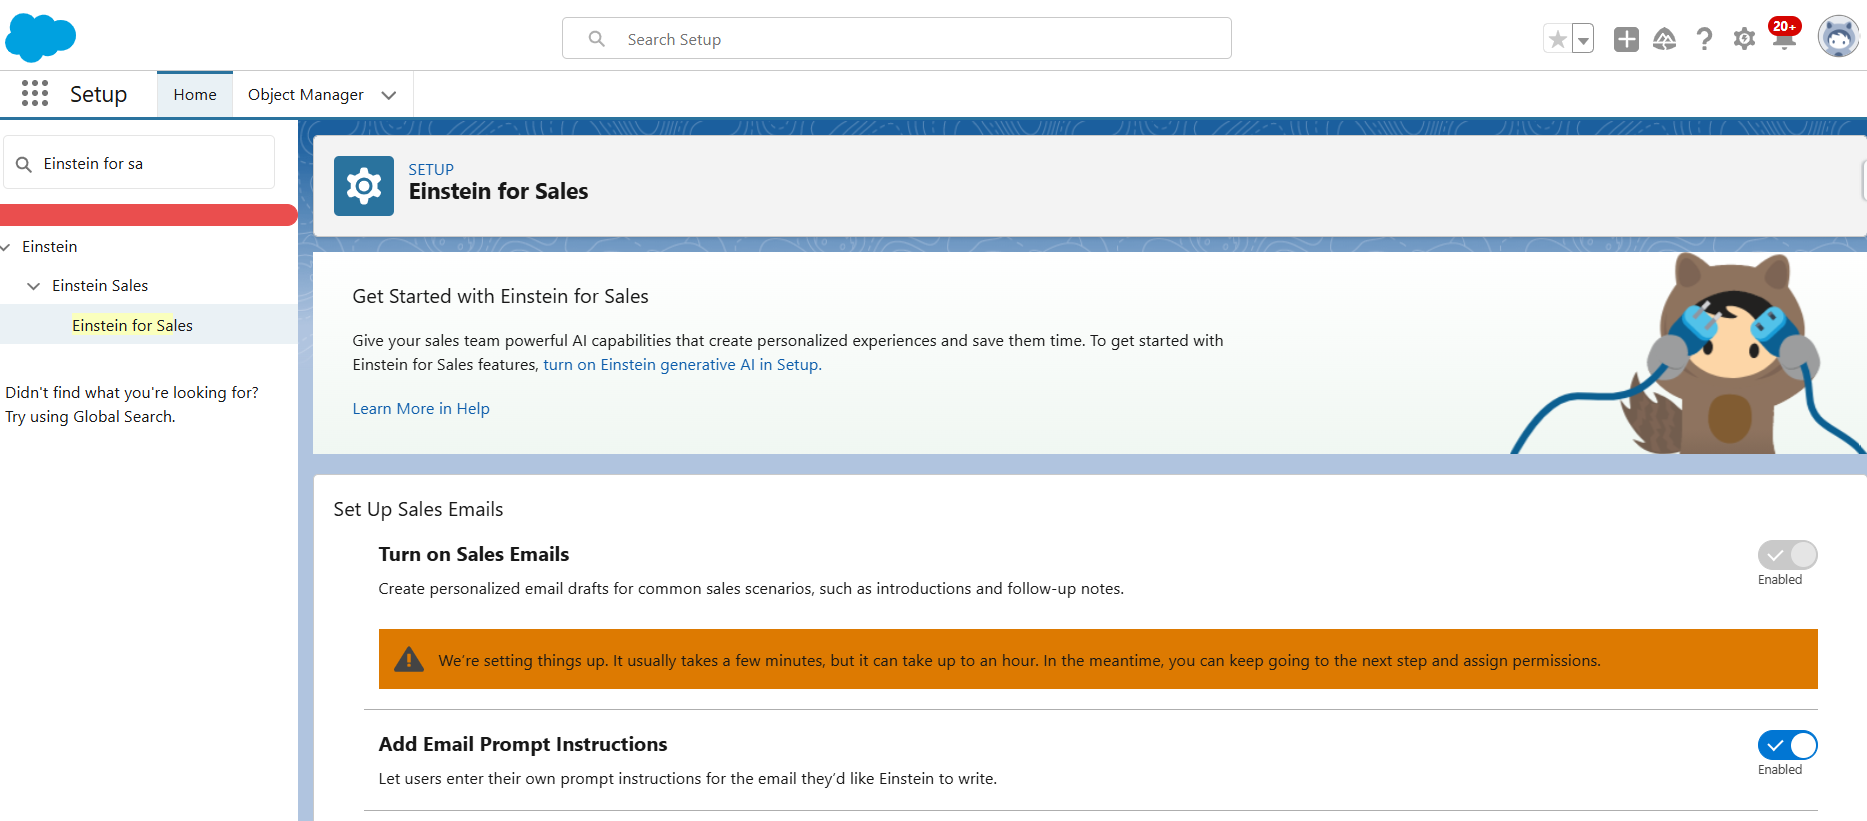
The Prompt Builder now includes an additional option to create a “Sales Email” template. Get this Trailhead Badge to get more insight on Sales Email Prompt Template.

Sample Bitbucket Pipeline Code
Here I am sharing a smaple of Bitbucket Pipeline Code. Please go to this link to check the Bitbucket Pipeline Configuration steps.
Please feel free to connect with me in linkedin, if you have any query related to Bitbucket Pipeline Code / Configuration.
# This file is a sample build configuration for Docker.
# See the guides at https://confluence.atlassian.com/x/O1toN for more examples.
# Only use spaces to indent your .yml configuration.
# --test-level Permissible values are: NoTestRun, RunSpecifiedTests, RunLocalTests, RunAllTestsInOrg
# RunSpecifiedTests: --tests TESTS || - Separate the test names with spaces: --tests Test1 Test2 "Test With Space"
# Reference Link: https://developer.salesforce.com/docs/atlas.en-us.sfdx_cli_reference.meta/sfdx_cli_reference/cli_reference_project_commands_unified.htm
# -----
# You can specify a custom docker image from Docker Hub as your build environment.
image:
  name: salesforce/cli:latest-full
pipelines:
  branches:
    feature/*:
      - step:
          name: Build and Validate
          deployment: Deploy_UAT
          script:
          #Assign variables
          - export TESTLEVEL=NoTestRun
          - export TESTLEVEL1=RunLocalTests
          - export TESTLEVEL2=RunSpecifiedTests
          - export TESTS=$(<SpecifiedTest.txt)
          #Decrypt server key
          - openssl enc -nosalt -aes-256-cbc -d -in assets/server.key.enc -out assets/server.key -base64 -K $DECRYPTION_KEY -iv $DECRYPTION_IV
          #Authorize target org
          - sfdx auth:jwt:grant --instance-url $ENDPOINT --client-id $CONSUMER_KEY --jwt-key-file assets/server.key --username $USER_NAME --alias myOrg
          #Install sfdx-git-delta
          - echo y | sf plugins install sfdx-git-delta
          #Findout Delta
          - git config remote.origin.fetch '+refs/heads/*:refs/remotes/origin/*'
          - git fetch --all
          - git --no-pager diff --name-status $BITBUCKET_BRANCH origin/develop_UAT
          - sfdx sgd:source:delta --to $BITBUCKET_BRANCH --from origin/develop_UAT --output "."
          #Print Test Class Names
          - echo $TESTS
          #Run a check-only deploy
          #Remove --dry-run to actually deploy the changes
          #If SpecifiedTest File contains only "Default" keyword, it executes "NoTestRun"
          #If SpecifiedTest File contains only Test Class Names separated by spaces, it executes "RunSpecifiedTests"
          #If SpecifiedTest File is empty, it executes "RunLocalTests"
          - if [[ $TESTS != "" ]]; then
          - if [[ $TESTS == "Default" ]]; then
          - sf project deploy start --wait 10 -x package/package.xml --target-org myOrg --test-level $TESTLEVEL --dry-run
          - else
          - sf project deploy start --wait 10 -x package/package.xml --target-org myOrg --test-level $TESTLEVEL2 --tests $TESTS "Test With Space" --dry-run
          - fi
          - else
          - sf project deploy start --wait 10 -x package/package.xml --target-org myOrg --test-level $TESTLEVEL1 --dry-run
          - fi
How to configure Bitbucket Pipeline
- Create a Self Signed Digital Certificate first
- Create a Connected App. Upload the Digital Certificate while creating it. Keep the Consumer Key and Consumer Secret handy.
- Encrypt the server key.
- Go to your Command Prompt again and execute the following command to generate a key and initializtion vector (iv) to encrypt the server.key file locally. The key and iv are used by Bitbucket Pipeplines to decrypt the server key in the build environment. Keep the key and iv handy.
//Generate key and iv

openssl enc -aes-256-cbc -k MY_PASS -P -md sha1 -nosalt
//Encrypt the server key

openssl enc -nosalt -aes-256-cbc -in /Bitbucket/JWT/server.key -out /Bitbucket/JWT/server.key.enc -base64 -K GENERATED_KEY_IN_LAST_STEP -iv GENERATED_IV_IN_LAST_STEP
Inside the Bitbucket
- Enable Two Step Verification
- Create a Repository, entering a Project Name and Repository Name
- Go to Repository settings -> Settings -> Enable Pipelines
- Go to Repository variables and set KEY and IV

- Go to Deployment and set the Deployment Variables

- ENDPOINT – Sandbox / Production Instance url
- CONSUMER_KEY – From Connected App
- USER_NAME – Username of the Deployment Admin
Create a Project in VS Code
- Go to VS Code
- Create an empty project
- Create a folder called assets as shown in the screenshot
- Keep the server.key.enc file inside the assets folder
- Keep the bitbucket-pipelines.yml and SpecifiedTest.txt files inside the project folder as shown in the screenshot

- Connect the VS Code with the Bitbucket repository
- Checkout a feature branch in VS Code
- Commit and Push the project
Self Signed Digital Certificate Creation to configure Bitbucket Pipeline
- Download and Install OpenSSL
- Go to this link https://slproweb.com/products/Win32OpenSSL.html and download the exe file as per your system configuration
- Setup environment variable – C:\Program Files\OpenSSL-Win64\bin
- Create a Self Signed Digital Certificate
- Open the Command Prompt
- Create a directory
mkdir C:\Bitbucket\JWT - Go to JWT directory
cd C:\Bitbucket\JWT - Generate a private key, and store it in a file called server.key
openssl genpkey -des3 -algorithm RSA -pass pass:MY_PASS -out server.pass.key -pkeyopt rsa_keygen_bits:2048
openssl rsa -passin pass:MY_PASS -in server.pass.key -out server.key
- Now delete the server.pass.key file from the C:\Bitbucket\JWT directory
- Generate a certificate signing request using the server.key file. Store the certificate signing request in a file called server.csr
openssl req -new -key server.key -out server.csr
- Enter these details one by one
- Country Code:
- State or Province:
- Locality:
- Organization Name:
- Organizational Unit Name:
- Common Name:
- Email Address:
- Challenge Password:
- Optional Company Name:
- Generate a self-signed digital certificate from the server.key and server.csr files. Store the certificate in a file called server.crt
openssl x509 -req -sha256 -days 365 -in server.csr -signkey server.key -out server.crt
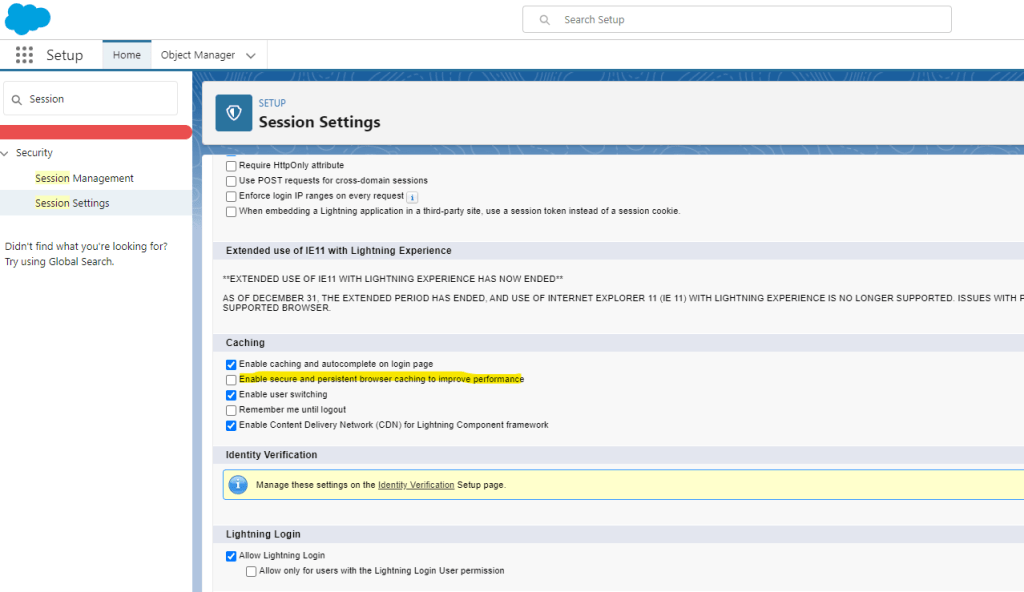
Want to see the effect immediately after updating your Lightning Page?
- Go to Setup
- Go to Session Settings
- Uncheck “Enable secure and persistent browser caching to improve performance”
Type of Data Fields
- Text
- Text
- Text Area
- Rich Text Area
- Encrypted Text
- Numbers
- Number
- Currency
- Percent
- Date & Time
- Date
- Time
- Date Time
- Relationship
- Master-Detail
- Lookup
- Hierarchy
- Self-Relationship
- External
- Indirect
- Formatted Text
- Phone
- URL
- Restricted Choices
- Checkbox
- Picklist
- Multi Picklist
- Calculated
- AutoNumber
- Formula
- Rollup Summary
- Other
- Geolocation
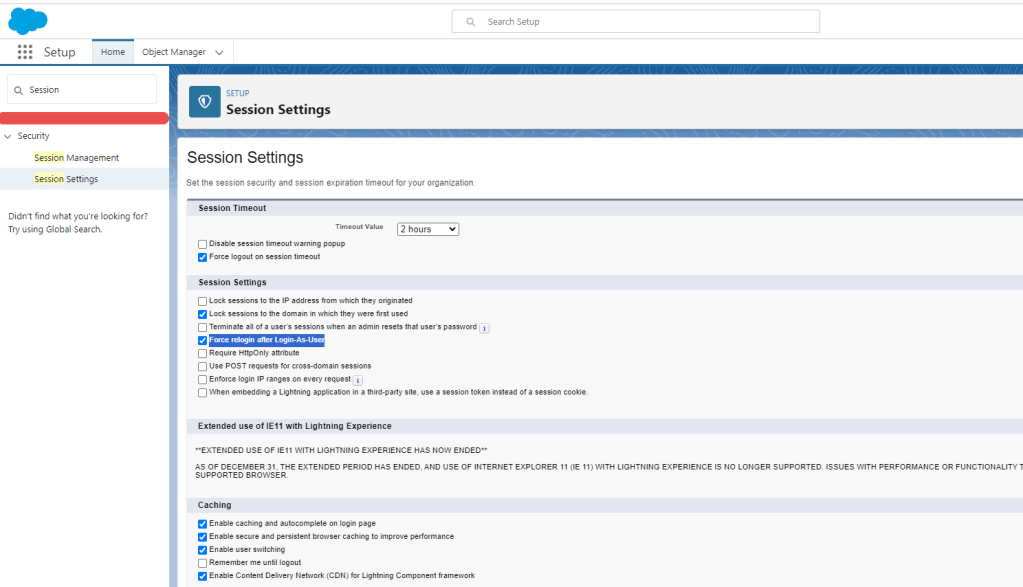
Force relogin after Login-As-User
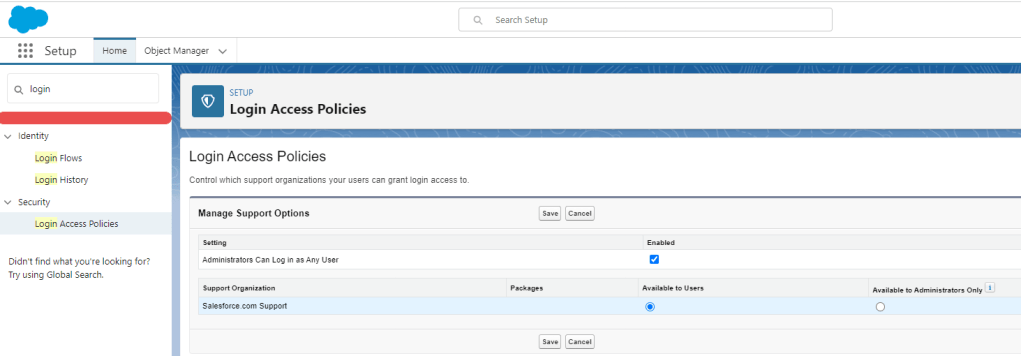
Administrators Can Log in as Any User
Three Identity Protocols
Creating a Prompt Template
To create a Prompt Template:
- Go to Setup.
- Type Prompt Builder in the Quick Find box.
- Click over Prompt Builder option.
- Click New Prompt Template button.
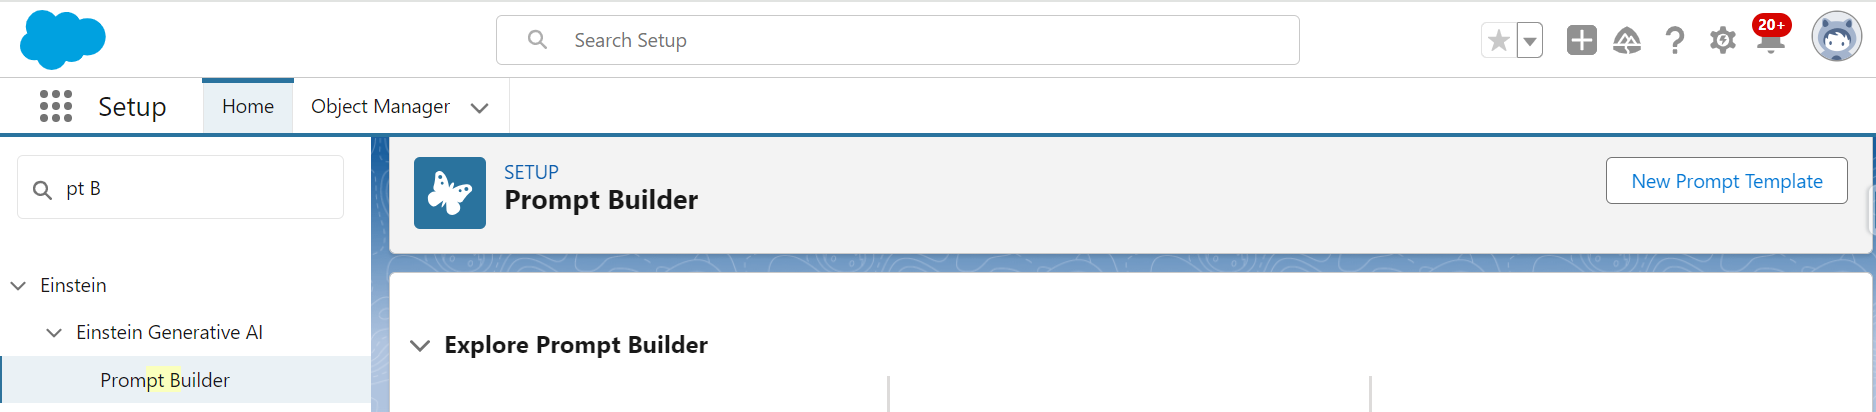
- There are three types of Prompt Templates.
- Field Generation – Complete this Trailhead Badge to get more insight on.
- Flex – Complete this Trailhead Badge to get more insight on.
- Record Summary – Complete this Trailhead Badge to get more insight on.
- Sales Email – The screenshot below does not show this option. Because, to create a sales email prompt template in Prompt Builder, we need the Einstein for Sales, Einstein for Platform, or Einstein for Service add-on. Check this for more details.

Get this Super Badge, if you feel like!
